GTrusted
Phone Charging Speed & Battery Life Performance Benchmarking


Chargers and Power Banks
Headphone & Speakers
Cases & Covers
Virtual Reality
Cables & Adapters
Media Player
Laptop
Tablet
Desktop
Cell Phone
Printers & Copiers
Memory Cards
TV
Computer Display
Game Console
Smart Home
Wearable Technology
Photo & Video Camera
Car Electronics
Car
Networking Equipment
Smart Toys
Home Audio & Video
Professional & Industrial
Storage Drive
Docking Station
Game Console Controllers
Set-top box
Keyboard, Mice, & Stylus
Portable Music Player
Computer Parts & Components
Cordless & Speakerphones
Projector
Software
Reporting
Mate30 Pro
by Huawei


Interested in this product?

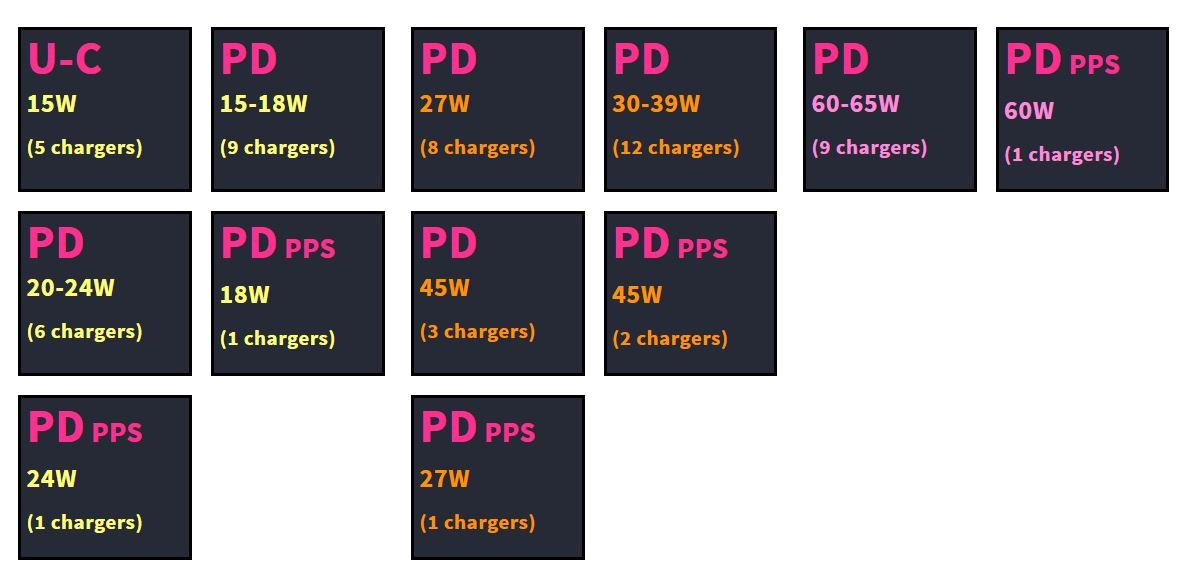
Interface Capabilities: (Click icon or tag for recommended products by interface)


Huawei's Mate 30 Pro Can Charge Faster Using USB Power Delivery 3.0 But Still Keeps to 40W SuperCharge Charging
The Huawei Mate30 Pro is one of the few 5G capable phones sold today which include competing phones like the Samsung Galaxy S10 5G and Xiaomi Mi 9 Pro 5G. The Huawei Mate30 Pro is also one of the first Huawei phones to support USB Power Delivery 3.0 (PD3) fast charging over USB Type-C. The increase of battery capacity to 4500 mAh allows the Huawei Mate30 Pro to be able to reach higher max power charging rates in the 22.5-27W range.
Like the 2018 Huawei Mate20 Pro, the Huawei Mate30 Pro also claims to achieve charging up to 40W using its own proprietary SuperCharge charging scheme. Similarly the Huawei Mate30 Pro also supports reverse wireless charging allowing the phone to wirelessly charge its own Huawei series or other Qi enabled phones such as the Apple iPhone 11 Pro Max and Google Pixel 4 XL as well as being able to be wirelessly charged itself. Unlike 15W Qi wireless charging on the Huawei Mate20 Pro, the Huawei Mate30 Pro can offer faster wireless charging of up to 27W.
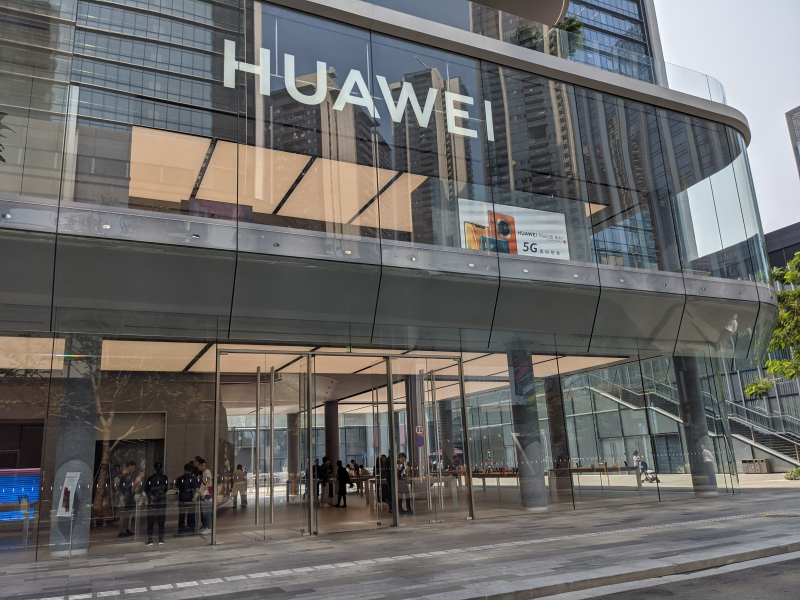
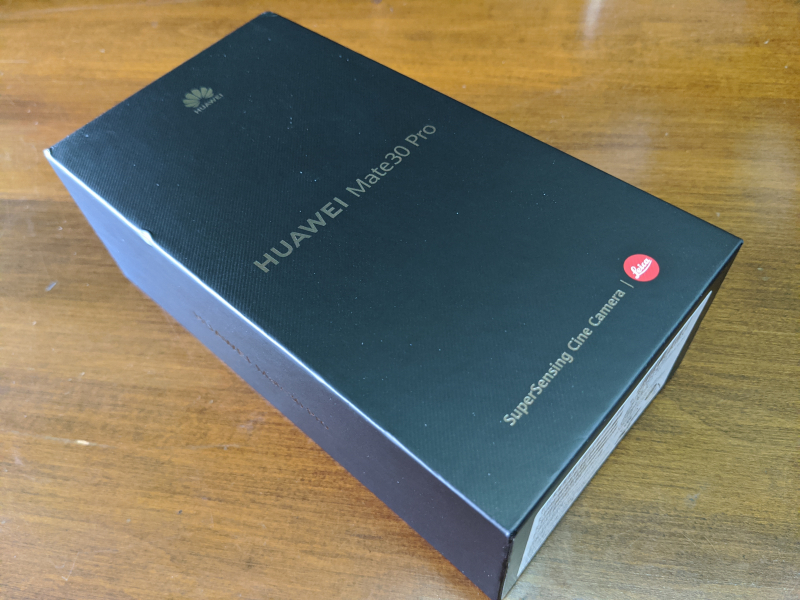
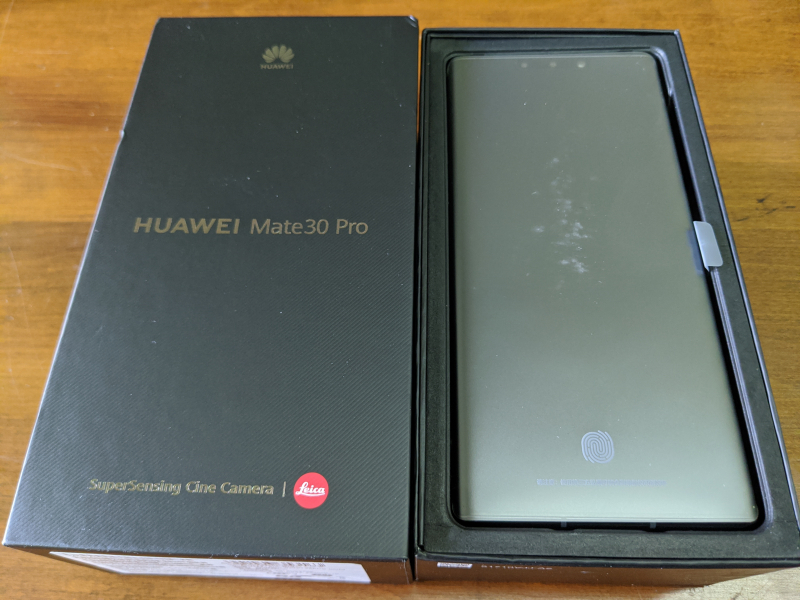
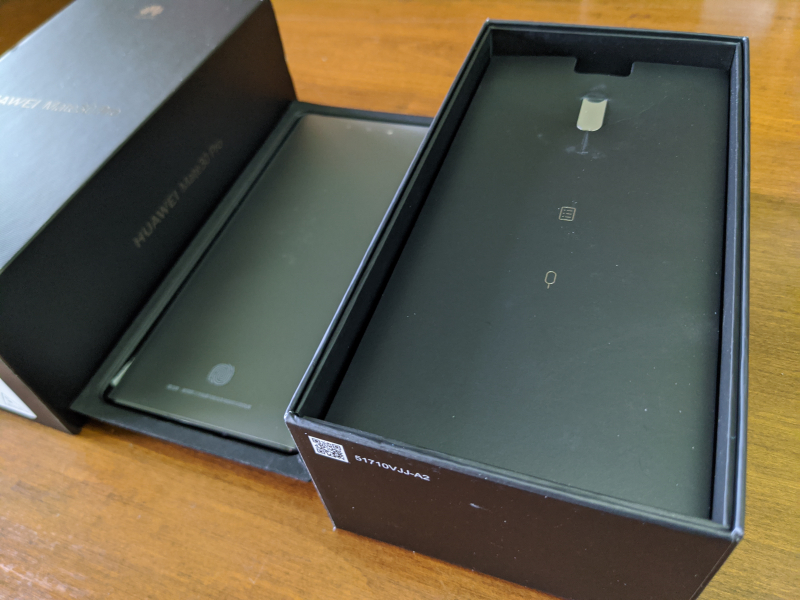
The Huawei Mate30 Pro uses a newer and faster HiSilicon Kirin 990 chipset, Mali-G76 MP16 GPU and Android 10.0 OS as well as up to 512GB RAM memory. Let's see how the Huawei Mate30 Pro looks like after we purchased the phone from a Huawei store recently.
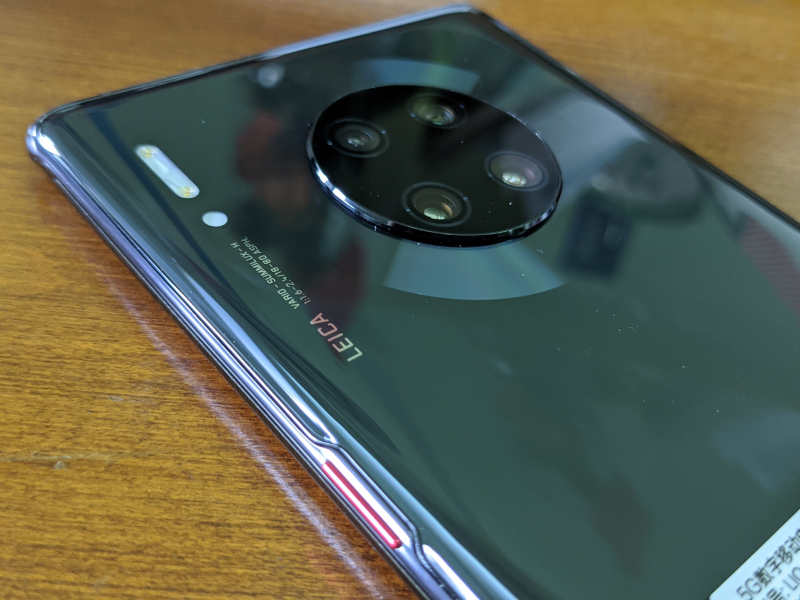
The Huawei Mate30 Pro advertises on the front of its box the Leica brand of SuperSensing Cine cameras used by the phone.
The Huawei Mate30 Pro like many of its Mate Pro series makes use of Huawei's SuperCharge technology that has been certified by Germany based TUV Rheinland for safe charging compliance.
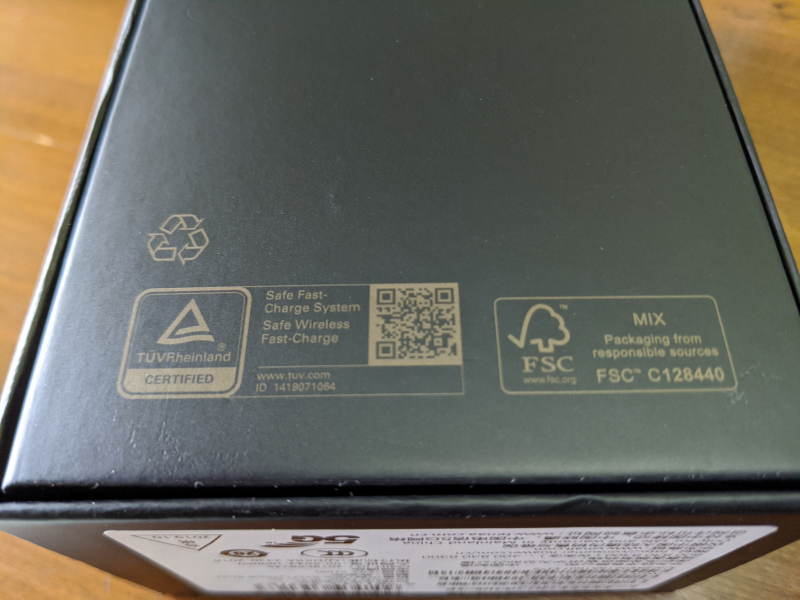
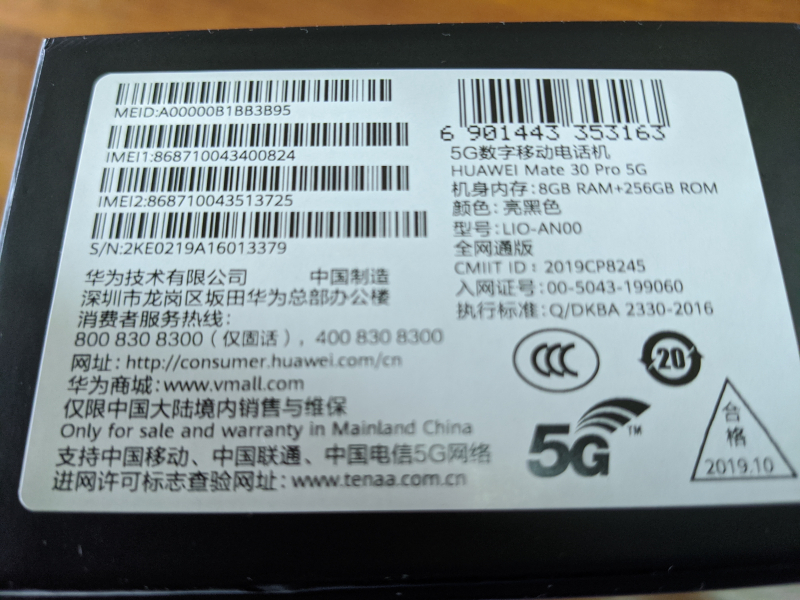
The side of the box highlights the official 5G logo indicating 5G LTE network compliance by the phone.
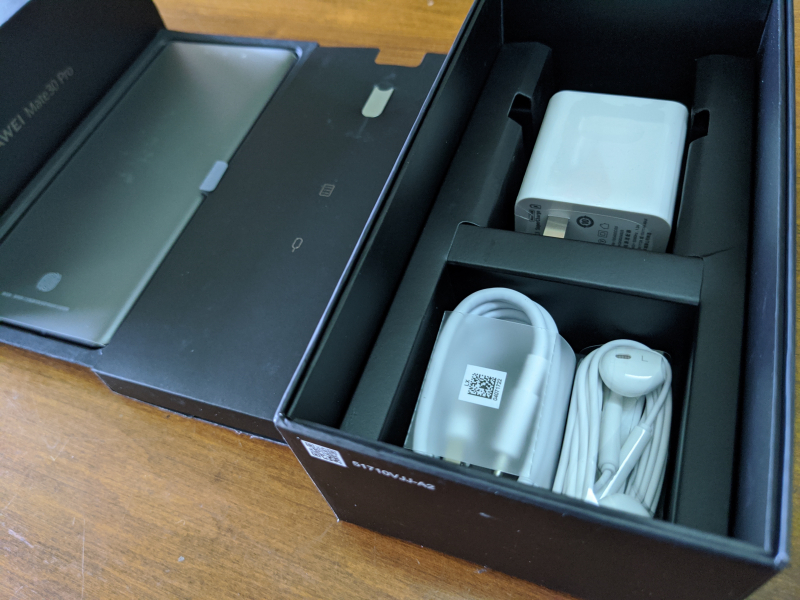
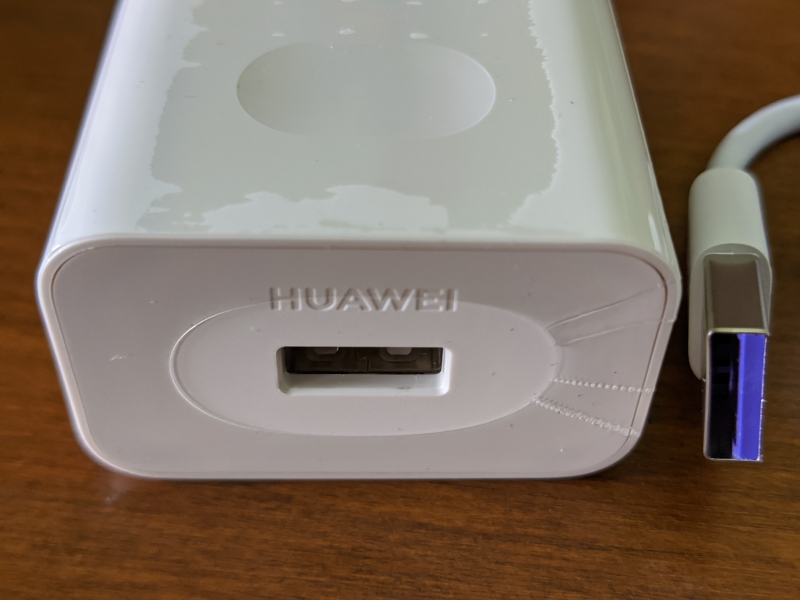
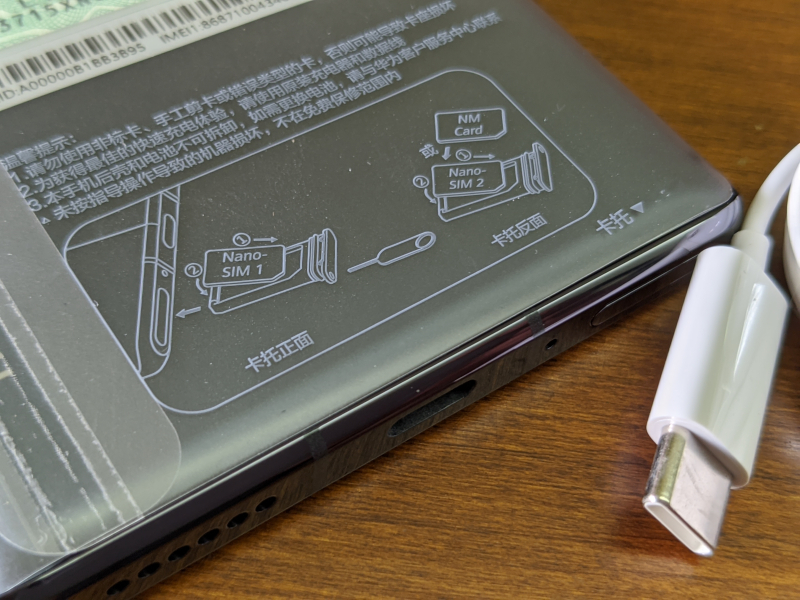
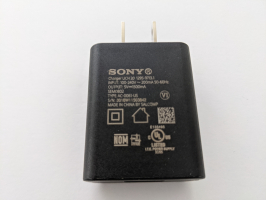
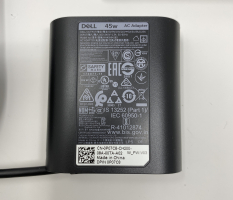
The accessories includes a AC power charger, USB Type-A to Type-C cable, Type-C earbuds, plastic phone cover and SIM eject tool.

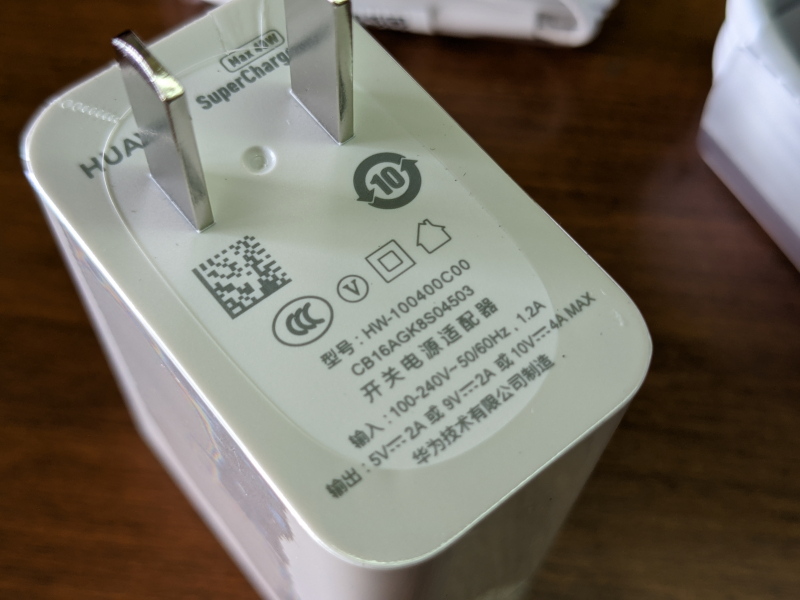
The The Huawei SuperCharge 40W AC Charger supports 10 watts (5 volts @ 2 amps), 18 watts (9 volts @ 2 amps) and 40 watts (10 volts @ 4 amps) power profiles which are also similar to the Huawei SuperCharge charger shipped with the Mate20 Pro. Note the charger and phone should be connected using the supplied USB Type-A to Type-C cable for fastest charging.
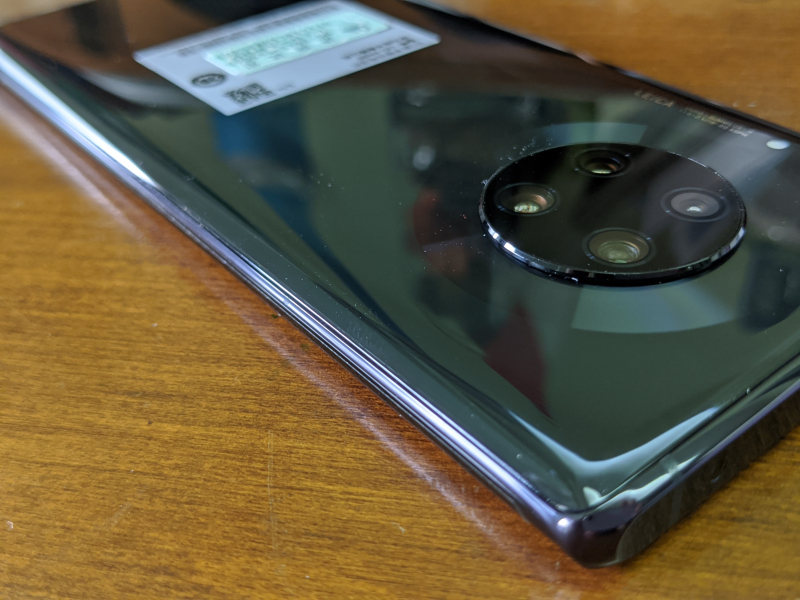
By comparison the Huawei Mate30 Pro has four rear cameras versus three on the Mate20 Pro. The quadruple rear camera setup consists of 40MP (wide), 40MP (ultrawide), 8MP (telephoto) and a new 3D TOF cameras. These Leica SUMMARIT-H branded cameras also came with 4K video capture capability.
The Huawei Mate30 Pro also boasts an additional 3D TOF camera on the front of the phone on top of a 32MP front camera.
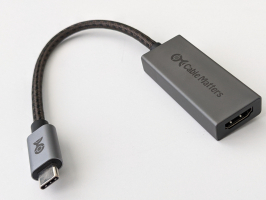
The USB Type-C connector supports USB 3.1 Gen 1 speeds and DisplayPort Alternate Mode along with Huawei's SuperCharge scheme and USB Power Delivery 3.0 technology for rapid charging.
In a similar move to adopting larger smartphone displays as seen on latest phones like the Xiaomi Mi 9 Pro 5G and Samsung Galaxy Note10+, the Huawei Mate30 Pro has also increased its screen size to 6.5 in which comes with Corning Gorilla Glass 6 protection.

Using the USB Power Delivery Compliance C2 Tester from Granite River Labs to run just a subset of the full USB Power Delivery compliance test suite, we can see that the Huawei Mate30 Pro supports 5 watts (5 volts @ 1 amps), 10 watts (5 volts @ 2 amps) and 18 watts (9 volts @ 2 amps) power profiles for charging. Some compliance failures were also observed for this phone.
Power Capabilities
Parameter
|
GetCapabilities
|
|---|---|
PD_POWER_AS_SOURCE
|
5000
|
NUM_SRC_PDOS
|
1
|
Supply Type #1
|
Fixed
|
Peak Current #1
|
0x0(A)
|
Voltage #1
|
0x64(5V)
|
Max Current #1
|
0x64(1A)
|
PD_POWER_AS_SINK
|
18000
|
NUM_SNK_PDOS
|
2
|
Supply Type #1
|
Fixed
|
Voltage #1
|
0x64(5V)
|
OP Current #1
|
0xC8(2A)
|
Supply Type #2
|
Fixed
|
Voltage #2
|
0xB4(9V)
|
OP Current #2
|
0xC8(2A)
|
PD2 Deterministic Tests - Test Result Summary
Sl No
|
Test ID
|
Test Name
|
Test Result
|
|---|---|---|---|
1
|
TD.PD.LL.E1
|
TD.PD.LL.E1 GoodCrc Timing
|
PASS
|
2
|
TD.PD.LL.E2
|
TD.PD.LL.E2 Retransmission
|
PASS
|
3
|
TD.PD.LL.E3
|
TD.PD.LL.E3 Soft Reset Usage
|
PASS
|
4
|
TD.PD.LL.E4
|
TD.PD.LL.E4 Hard Reset Usage
|
PASS
|
5
|
TD.PD.LL.E5
|
TD.PD.LL.E5 Soft Reset
|
PASS
|
6
|
TD.PD.LL.E6
|
TD.PD.LL.E6 Ping
|
PASS
|
7
|
TD.PD.SRC.E1
|
TD.PD.SRC.E1 Source Capabilities sent timely
|
PASS
|
8
|
TD.PD_SRC.E2
|
TD.PD_SRC.E2 Source Capabilities Fields Checks
|
PASS
|
9
|
TD.PD.SRC.E3
|
TD.PD.SRC.E3 SourceCapabilityTimer Timeout
|
PASS
|
10
|
TD.PD.SRC.E4
|
TD.PD.SRC.E4 SenderResponseTimer Deadline Request
|
PASS
|
11
|
TD.PD.SRC.E5
|
TD.PD.SRC.E5 SenderResponseTimer Timeout Request
|
PASS
|
12
|
TD.PD.SRC.E6
|
TD.PD.SRC.E6 PSHardResetTimer Timeout
|
PASS
|
13
|
TD.PD.SRC.E7
|
TD.PD.SRC.E7 Accept sent timely
|
PASS
|
14
|
TD.PD.SRC.E8
|
TD.PD.SRC.E8 Accept Fields Checks
|
PASS
|
15
|
TD.PD.SRC.E9
|
TD.PD.SRC.E9 PS RDY sent timely
|
PASS
|
16
|
TD.PD.SRC.E10
|
TD.PD.SRC.E10 PS RDY Fields Checks
|
PASS
|
17
|
TD.PD.SRC.E11
|
TD.PD.SRC.E11 Accept Requests can be met
|
PASS
|
18
|
TD.PD.SRC.E12
|
TD.PD.SRC.E12 Reject Requests cannot be met
|
PASS
|
19
|
TD.PD.SRC.E13
|
TD.PD.SRC.E13 Reject Request Invalid Object Position
|
PASS
|
20
|
TD.PD.SRC.E14
|
TD.PD.SRC.E14 Atomic Message Sequence
|
PASS
|
21
|
TD.PD.SRC.E15
|
TD.PD.SRC.E15 Give Source Cap
|
PASS
|
22
|
TD.PD.SRC.E16
|
TD.PD.SRC.E16 PDO Transition
|
PASS
|
23
|
TD.PD.SNK.E1
|
TD.PD.SNK.E1 SinkWaitCapTimer Deadline
|
PASS
|
24
|
TD.PD.SNK.E2
|
TD.PD.SNK.E2 SinkWaitCapTimer Timeout
|
PASS
|
25
|
TD.PD.SNK.E3
|
TD.PD.SNK.E3 Request Sent Timely
|
PASS
|
26
|
TD.PD.SNK.E4
|
TD.PD.SNK.E4 Request Fields Checks
|
PASS
|
27
|
TD.PD.SNK.E5
|
TD.PD.SNK.E5 SenderResponseTimer Deadline Accept
|
PASS
|
28
|
TD.PD.SNK.E6
|
TD.PD.SNK.E6 SenderResponseTimer Timeout Accept
|
PASS
|
29
|
TD.PD.SNK.E7
|
TD.PD.SNK.E7 PSTransitionTimer Deadline
|
PASS
|
30
|
TD.PD.SNK.E8
|
TD.PD.SNK.E8 PSTransitionTimer Timeout
|
PASS
|
31
|
TD.PD.SNK.E9
|
TD.PD.SNK.E9 GetSinkCap in Place of Accept
|
PASS
|
32
|
TD.PD.SNK.E10
|
TD.PD.SNK.E10 GetSinkCap in Place of PS RDY
|
PASS
|
33
|
TD.PD.SNK.E12
|
TD.PD.SNK.E12 Compatibility with PD3 Source
|
PASS
|
34
|
TD.PD.PC.E2
|
TD.PD.PC.E2 PS RDY Sent Timely
|
PASS
|
35
|
TD.PD.PC.E3
|
TD.PD.PC.E3 PSSourceOnTimer Deadline
|
PASS
|
36
|
TD.PD.PC.E4
|
TD.PD.PC.E4 PSSourceOnTimer Timeout
|
PASS
|
37
|
TD.PD.PC.E5
|
TD.PD.PC.E5 tSwapSinkReady Check
|
PASS
|
39
|
TD.PD.CP.E1
|
TD.PD.CP.E1 PSSourceOffTimer Deadline
|
PASS
|
40
|
TD.PD.CP.E2
|
TD.PD.CP.E2 PSSourceOffTimer Timeout
|
PASS
|
41
|
TD.PD.CP.E3
|
TD.PD.CP.E3 PS RDY Sent Timely
|
PASS
|
42
|
TD.PD.CP.E4
|
TD.PD.CP.E4 SwapSourceStartTimer Timeout
|
PASS
|
43
|
TD.PD.CP.E5
|
TD.PD.CP.E5 PDO Transition After PR Swap
|
PASS
|
44
|
TD.PD.VDMU.E1
|
TD.PD.VDMU.E1 Fields Checks Discover Identity
|
PASS
|
45
|
TD.PD.VDMU.E2
|
TD.PD.VDMU.E2 Fields Checks Discover SVIDs
|
PASS
|
46
|
TD.PD.VDMU.E3
|
TD.PD.VDMU.E3 Fields Checks Discover Modes
|
PASS
|
47
|
TD.PD.VDMU.E4
|
TD.PD.VDMU.E4 Fields Checks Enter Mode
|
PASS
|
48
|
TD.PD.VDMU.E5
|
TD.PD.VDMU.E5 Fields Checks Exit Mode
|
PASS
|
49
|
TD.PD.VDMU.E6
|
TD.PD.VDMU.E6 tVDMReceiverResponse Discover Identity
|
PASS
|
50
|
TD.PD.VDMU.E7
|
TD.PD.VDMU.E7 tVDMReceiverResponse Discover SVIDs
|
PASS
|
51
|
TD.PD.VDMU.E8
|
TD.PD.VDMU.E8 tVDMReceiverResponse Discover Modes
|
PASS
|
52
|
TD.PD.VDMU.E9
|
TD.PD.VDMU.E9 tVDMReceiverResponse Enter and Exit Mode
|
PASS
|
53
|
TD.PD.VDMU.E10
|
TD.PD.VDMU.E10 Incorrect SVID_Discover Identity
|
PASS
|
54
|
TD.PD.VDMU.E11
|
TD.PD.VDMU.E11 Incorrect SVID Discover SVIDs
|
PASS
|
55
|
TD.PD.VDMU.E12
|
TD.PD.VDMU.E12 Incorrect SVID Discover Modes
|
PASS
|
57
|
TD.PD.VDMU.E14
|
TD.PD.VDMU.E14 Incorrect SVID Exit Mode
|
PASS
|
58
|
TD.PD.VDMU.E15
|
TD.PD.VDMU.E15 Applicability
|
PASS
|
59
|
TD.PD.VDMU.E16
|
TD.PD.VDMU.E16 Interruption by PD Command
|
FAIL
|
60
|
TD.PD.VDMU.E17
|
TD.PD.VDMU.E17 Interruption by VDM Command
|
FAIL
|
61
|
TD.PD.VDMU.E18
|
TD.PD.VDMU.E18 tDRSwapHardReset
|
PASS
|
62
|
TD.PD.VDMU.E19
|
TD.PD.VDMU.E19 Version
|
FAIL
|
63
|
TD.PD.VDMD.E1
|
TD.PD.VDMD.E1 tVDMSenderResponse Deadline Discover Identity
|
PASS
|
64
|
TD.PD.VDMD.E2
|
TD.PD.VDMD.E2 tVDMSenderResponse Timeout Discover Identity
|
PASS
|
65
|
TD.PD.VDMD.E3
|
TD.PD.VDMD.E3 Incorrect Fields Discover Identity
|
PASS
|
66
|
TD.PD.VDMD.E4
|
TD.PD.VDMD.E4 Applicability
|
PASS
|
69
|
TD.PD.VNDI.E3
|
TD.PD.VNDI.E3 VDM Modes
|
FAIL
|
70
|
TD.PD.VNDI.E4
|
TD.PD.VNDI.E4 SOP Handling
|
FAIL
|
71
|
TD.PD.VNDI.E5
|
TD.PD.VNDI.E5 Source Capabilities
|
FAIL
|
72
|
TD.PD.VNDI.E6
|
TD.PD.VNDI.E6 Sink Capabilities
|
FAIL
|
73
|
TD.PD.VNDI.E7
|
TD.PD.VNDI.E7 Dual Role Devices Accepts PR Swap as Source
|
FAIL
|
74
|
TD.PD.VNDI.E8
|
TD.PD.VNDI.E8 Dual Role Devices Accepts PR Swap as Sink
|
FAIL
|
75
|
TD.PD.VNDI.E9
|
TD.PD.VNDI.E9 Dual Role Devices Requests PR Swap as Source
|
FAIL
|
76
|
TD.PD.VNDI.E10
|
TD.PD.VNDI.E10 Dual Role Devices Requests PR Swap as Sink
|
FAIL
|
77
|
TD.PD.PHY.E1
|
TD.PD.PHY.E1 BIST Test Data
|
PASS
|
80
|
TD.PD.PHY.E4
|
TD.PD.PHY.E4 Transmitter Bit Rate and Bit Rate Drift
|
PASS
|
81
|
TD.PD.PHY.E5
|
TD.PD.PHY.E5 Transmitter Collision Avoidance
|
PASS
|
82
|
TD.PD.PHY.E6
|
TD.PD.PHY.E6 Receiver Swing Tolerance
|
PASS
|
83
|
TD.PD.PHY.E7
|
TD.PD.PHY.E7 Receiver Bit Rate Tolerance
|
PASS
|
84
|
TD.PD.PHY.E8
|
TD.PD.PHY.E8 Receiver Bit Rate Deviation Tolerance
|
PASS
|
85
|
TD.PD.PHY.E9
|
TD.PD.PHY.E9 Valid SOP Framing
|
PASS
|
86
|
TD.PD.PHY.E10
|
TD.PD.PHY.E10 Invalid SOP Framing
|
PASS
|
87
|
TD.PD.PHY.E11
|
TD.PD.PHY.E11 Valid SOP P Framing
|
PASS
|
88
|
TD.PD.PHY.E12
|
TD.PD.PHY.E12 Invalid SOP P Framing
|
PASS
|
89
|
TD.PD.PHY.E13
|
TD.PD.PHY.E13 Valid SOP PP Framing
|
PASS
|
92
|
TD.PD.PHY.E16
|
TD.PD.PHY.E16 Valid Hard Reset Framing
|
PASS
|
93
|
TD.PD.PHY.E17
|
TD.PD.PHY.E17 Invalid Hard Reset Framing
|
PASS
|
94
|
TD.PD.PHY.E18
|
TD.PD.PHY.E18 Valid Cable Reset Framing
|
PASS
|
95
|
TD.PD.PHY.E19
|
TD.PD.PHY.E19 Invalid Cable Reset Framing
|
PASS
|
96
|
TD.PD.PHY.E20
|
TD.PD.PHY.E20 EOP Framing
|
PASS
|
97
|
TD.PD.PHY.E21
|
TD.PD.PHY.E21 Preamble
|
PASS
|
PD2 Communication Engine Tests - Test Result Summary
Sl No
|
Test ID
|
Test Name
|
Test Result
|
|---|---|---|---|
1
|
TDA.2.1.1.1
|
TDA.2.1.1.1 BMC PHY TX EYE
|
FAIL
|
2
|
TDA.2.1.1.2
|
TDA.2.1.1.2 BMC PHY TX BIT
|
PASS
|
3
|
TDA.2.1.2.2
|
TDA.2.1.2.2 BMC PHY RX INT REJ
|
FAIL
|
4
|
TDA.2.1.2.1
|
TDA.2.1.2.1 BMC PHY RX BUSIDL
|
FAIL
|
5
|
TDA.2.1.3.1
|
TDA.2.1.3.1 BMC PHY TERM
|
PASS
|
6
|
TDA.2.1.3.2
|
TDA.2.1.3.2 BMC PHY MSG
|
PASS
|
7
|
TDA.2.2.1
|
TDA.2.2.1 BMC PROT SEQ GETCAPS
|
PASS
|
8
|
TDA.2.2.2.1
|
TDA.2.2.2.1 BMC PROT SEQ CHKCAB P PC
|
PASS
|
9
|
TDA.2.2.2.2
|
TDA.2.2.2.2 BMC PROT SEQ CHKCAP NOMARK P PC
|
PASS
|
11
|
TDA.2.2.2.4
|
TDA.2.2.2.4 BMC PROT SEQ CHKCAP NOMRK CP ACC
|
PASS
|
16
|
TDA.2.2.7
|
TDA.2.2.7 BMC PROT BIST NOT 5V SRC
|
PASS
|
18
|
TDA.2.2.9
|
TDA.2.2.9 BMC PROT GSC REC
|
PASS
|
19
|
TDA.2.2.10
|
TDA.2.2.10 BMC PROT IGN PPS
|
PASS
|
20
|
TDA.2.3.1.1
|
TDA.2.3.1.1 POW SRC LOAD P PC
|
FAIL
|
22
|
TDA.2.3.2.1
|
TDA.2.3.2.1 POW SRC TRANS P PC
|
PASS
|
24
|
TDA.2.3.3.1
|
TDA.2.3.3.1 POW SNK TRANS C CP
|
FAIL
|
BMC Eye Diagram

View Full Article


Mate30 Pro Charging Technologies & Battery Life Benchmarking


Featured Products
by Apple